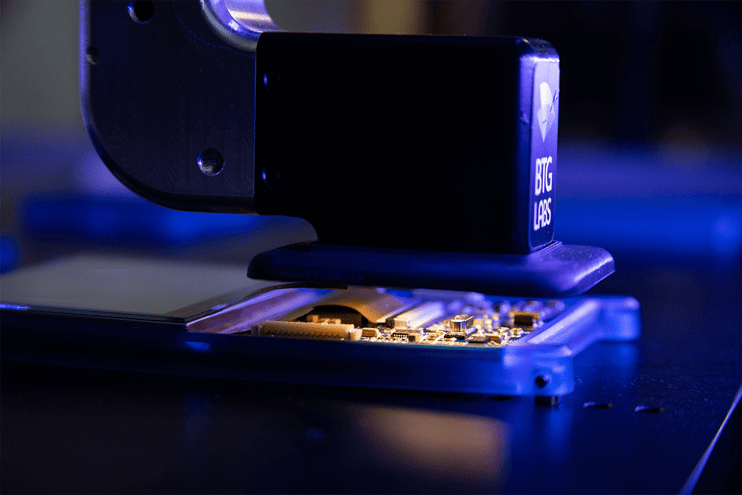
In order to create predictable adhesion outcomes in manufacturing, precision is key. When thinking about the success of a bonding, printing, coating, sealing, painting or cleaning application, manufacturers need a new perspective. Manufacturers need an approach that considers the entire adhesion process, is sensitive to the changes occurring on the material surface at a chemical level, and involves quantifiable data that action can be taken on.Regardless of industry or product, manufacturers have long struggled to eliminate adhesion failures they are currently experiencing or ones they are hoping to prevent during new product development. It’s understandable because they haven’t had a reliable way to control it.
But... there is a new approach to solving adhesion problems. There is also technology available to make it easier and more efficient than ever.
Define Surface Quality
Before a new approach to solving adhesion problems can be implemented, success needs to be defined. Manufacturers often know failure when they see it but may not truly recognize what makes adhesion work when it actually is strong. In order to do this, we need to look at the surface.
The surface of the constituent materials involved in the adhesion process needs to be properly prepared so that when it comes time to apply the adhesive, coating, ink, or paint, the surface is ready to fuse to it chemically. Surface readiness is surface quality. The state of the surface needs to be understood, measured, and controlled throughout the entire adhesion process.
Rethink your adhesion manufacturing processes with Surface Intelligence.
Outmoded Surface Quality Evaluation Methods
Historically there have not been methods of measuring surface quality that could give reliable, objective data. Some of these legacy methods include dyne ink tests for polymers, water break tests for metals and composites, and the ROSE test for electronics.
These tests have proven themselves to be outdated because they are inaccurate, subjective, and even harmful to surfaces or operators.
These tests also could not be performed directly on the production line, causing delays. Often, the results are too imprecise to make meaningful process changes, so they are essentially exercises in futility.
The Right Tools for the Job
Devices have been developed that make implementing a new approach to adhesion success possible.
This non-destructive technology has a high sensitivity to the chemical state of the material surface and provides actionable, quantitative data that is easy to understand.
There are both handheld devices and automated configurations, making it possible to inspect surface quality directly on the production line and in real-time. Having a truly portable device that accurately indicates if a surface is being properly prepared means there can be certainty about the results on the production line matching the results in the R&D lab.
Measuring surface quality throughout the entire adhesion process creates an accurate map of the changes a surface is going through, which can pinpoint the entry point of contamination or other causes of adhesion failure.
The tools are able to define the surface state by depositing a highly-controlled drop of water on the material and measuring to what degree that drop spreads out on the surface or beads up. The angle created by that drop offers a number that can be repeatedly achieved and used as a surface quality specification. This number correlates extremely well to surface quality and indicates how ready that surface is for adhesion. This precision and richness of data are unique in manufacturing when it comes to surface inspection.
The Solution is Not Just Another Tool
In order to truly fix an adhesion problem and gain total surface quality control, manufacturers need tools to monitor the adhesion process, but they also need help getting to the origins of the issue.
A holistic solution will involve Materials Science experts who specialize in getting to the root cause of adhesion problems. Surface Scientists with experience working in manufacturing industries need to be brought in. With the use of surface evaluation devices, these experts can help define surface quality as it relates directly to the manufacturer’s application and develop a spec to ensure consistency and predictability.
It’s fast. It’s accurate. It’s non-destructive. It’s the Automated Surface Analyst.
If adhesion failures are currently manifesting in your process, calling in Adhesion Process Experts to conduct Root Cause Analysis will give you the information you need to eradicate the problem from the source. When you can work from a clean slate, all you need to do is monitor the process to make sure everything is going according to plan.
So, in the end, there is hope for manufacturers who are eager for a new way to solve their adhesion problems because everything up until now has been a half-measure. Manufacturers need a holistic approach that considers every variable that needs to be controlled throughout the entire adhesion process. Surface Science is complex and requires a fresh perspective and innovative technology to get to the essence of the adhesion problems facing manufacturers.
To learn more about the root cause analysis of adhesion issues and how to implement these new solutions into your process, download our eBook, “Checklist: Adhesion Failure Root-Cause Analysis for Manufacturers.”


