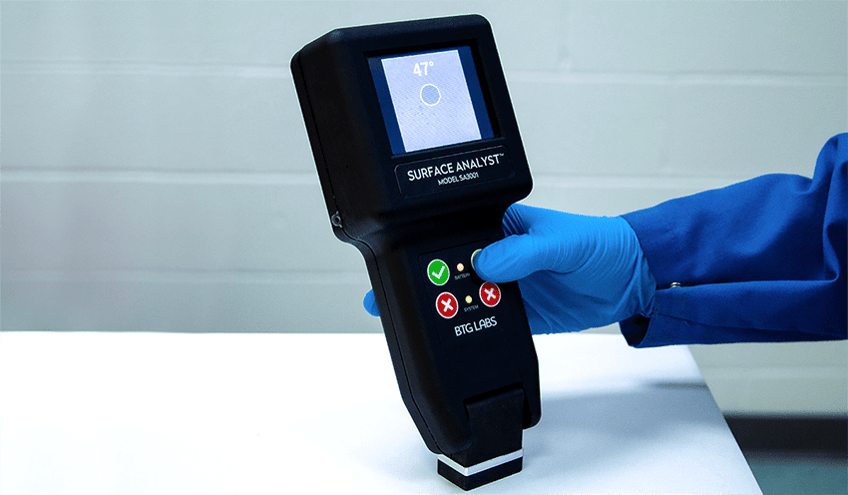
An exciting development is taking place to make surface quality and cleanliness inspection technology more available to all manufacturers. We have collaborated with ASTM International and other stakeholders to craft a revision to establish a standard use of handheld goniometers in production environments.
ASTM International is one of the largest manufacturing standards organizations that promote the development and publication of process standards for materials, products, systems, and services. They develop technical documents that are the basis of manufacturing, management, procurement, codes, and regulations for dozens of industries. ASTM’s paint and related coatings, materials, and applications committee (D01) is developing the proposed standard (WK72334).
 The proposed ASTM International standard will allow manufacturers to make better use of portable goniometers to measure angles of drops of liquid when applied to a surface for testing the wettability of coatings, substrates, and pigments. This measurement of how drops interact with materials surfaces is called the contact angle. Quality specifications built around the numerical degree these measurements produce give manufacturers a higher level of control over their cleaning and adhesion process than ever before. This measurement allows manufacturers to make decisions relating to surface quality based on quantifiable data.
With the proposed standard, the use of tools designed for use on production lines to take these contact angle measurements will be that much more widespread. The broader the use of these instruments to conduct nondestructive testing, the less scrap, rework, recalls, and returns will haunt manufacturers. A key benefit of the standard is that engineers will be able to easily write in references to internal and supplier specifications establishing a common language across departments and stakeholders. If the portable goniometer test method is recognized by ASTM, it will make it extremely easy to implement and enforce as the primary guideline for process control plans and quality standards.
Rethink your adhesion manufacturing processes with Surface Intelligence.
What is a Goniometer Used to Measure?
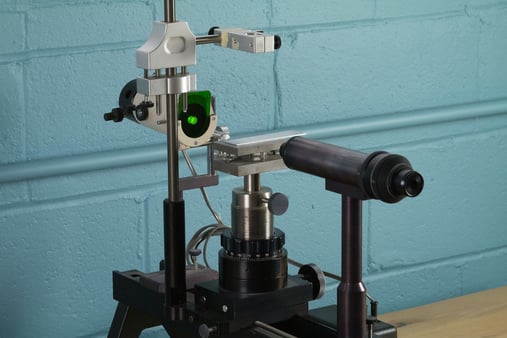
Traditional goniometers are benchtop laboratory instruments used to analyze and measure the surface energy of materials. Surface energy refers to the chemical composition of the top few molecular layers of a material’s surface and how chemically reactive those molecules are. The more reactive a surface is, the more surface energy it has, and the inverse is also true.
A goniometer can measure a material’s surface energy by carefully depositing a drop of water onto a flat sample of that material. The water molecules will either be attracted to the surface, and the drop will wet out or spread across the surface, or the water molecules will be more attracted to themselves, and the drop will bead up into as close to a spherical shape as it can get. The molecules in the water always find that balance between how attracted they are to the surface and to themselves. This balanced attraction is based on the surface energy of the molecules on the material surface and how strongly they can divert the interest of the water molecules away from themselves.
To learn more about making the use of portable contact angle measurement systems more universal, download our eBook: Predictable Adhesion in Manufacturing Through Process Verification.
The reliability of the relationship between the water molecules and the molecules of other substances means the measurement can tell you a lot about what is on the surface of your materials. If there are microscopic residues that could be detrimental to adhesion on the surface of your materials, the water molecules will be sensitive to these contaminants and will reveal their presence through a contact angle measurement.
Benchtop goniometers take this measurement by carefully controlling the volume of water placed on the surface and using a scope pointed at the side of the water drop to evaluate the angle the edge of the drop makes with the surface of the material. This is all done manually with the benchtop models. The sessile drop is placed by the user of the instrument, and the measurement is also taken by the user.
Overcoming the Disadvantages of Benchtop Goniometers
Some of the limitations of a conventional goniometer are fairly obvious in that they are highly technical, stationary pieces of lab equipment. It’s valuable to dismantle parts going through a manufacturing process to be tested in another location, but it’s far more valuable to be able to conduct those same tests directly on the parts without harming them and without interrupting the flow of production.
“The ability to bridge the gap between the research and testing laboratory and the production line touches nearly every industry,” says ASTM International member and BTG Labs’ Technical Advisor for Aerospace Applications, Lucas Dillingham. “Being able to conduct reliable, accurate, quantitative and nondestructive testing of surface preparation for bonding, and to be able to conduct these tests directly on real parts in a manufacturing process, means the preliminary lab work can be more fruitful.”
That’s what portable and in-line contact angle testing brings to manufacturers. The information gathered from these tests is crucial to building an effective cleaning, treatment and adhesion process. Contact angle measurements indicate with brutal precision how clean and ready for bonding, coating, printing, painting, or sealing a surface is. If these inspections are able to be done on a part immediately after a cleaning or treatment step, coming out of storage, being delivered from a supplier, or anywhere the surface has a chance of being altered in any way, this allows manufacturers to be nimble and proactive as opposed to reactive, wasting precious time.
Portable contact angle measurement systems that utilize an advanced top-down video scope and instant data-processing algorithm to provide the test results have an even greater advantage over typical goniometers. Taking measurements from a side view of the liquid drop only allows for up to two measurements. With a top-down approach, up to 64 contact angles can be measured, completely amplifying the precision and accuracy of the final results. This also means that the drop does not need to be placed on an even, flat surface. A real-world, non-uniform surface will create non-uniformities in the drop when deposited on it, but this is overcome with a top-down view allowing for measurements to be taken on any surface geometry.
Revolutionize Your Manufacturing with Surface Quality Inspection Technology.
Also, these portable instruments are designed with the user in mind. Where a benchtop goniometer requires a lot of training to conduct tests and analyze results, a handheld or in-line version works by pressing one button and getting a single number in two seconds. If that number falls within the quality specification, then the user can be certain their process is working properly. If the number falls out of spec, then the user can further investigate the issue with the portable goniometer to conduct a root cause analysis.
What Does the Proposal Say?
According to Dillingham, the proposed standard will allow for wettability testing (evaluating how much the liquid drop spreads out on the surface) that can be done quickly and repeatedly on real parts or real production lines to prevent failures. Manufacturers will be able to use it to control supply chains by implementing surface quality checks of incoming materials. Regulatory bodies could find the proposed standard helpful in ensuring consistency of cleaning methods to create surfaces ideal for adhesion. Labs will use it to create a common language of validation between their testing and the testing done on actual production lines.
ASTM standards are voluntary in that their use is not mandated. However, government regulators often give voluntary standards the force of law by citing them in laws, regulations, and codes. ASTM standards are used by individuals, companies, and other institutions around the world. Purchasers and sellers incorporate standards into contracts; scientists and engineers use them in their laboratories and offices; architects and designers use them in their plans; government agencies around the world reference them in codes, regulations, and laws; and many others refer to them for guidance.
To find out more about how manufacturers will be greatly helped by making the use of portable contact angle measurement systems more universal, download our eBook on process control. The book outlines how measuring surface quality throughout the entire manufacturing process is crucial to ensuring failure-free products are making it to market. Get your copy now, Predictable Adhesion in Manufacturing Through Process Verification.


